Deck Staining and Sealing: 7 Best Steps & Pro Tips
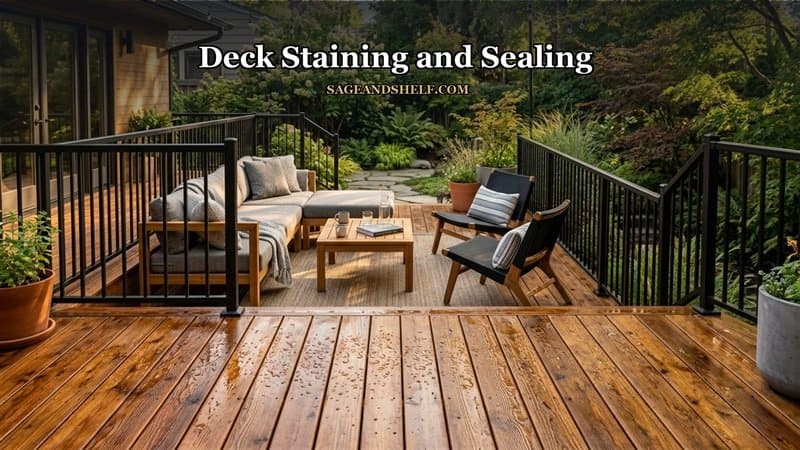
Protecting outdoor timber from harsh sun exposure, driving rain, and winter snow requires consistent seasonal maintenance. When applying a high-grade penetrating wood stain, weathered cedar and pressure-treated pine regain rich, lustrous warmth. Specifically, proper deck staining and sealing creates an impermeable moisture shield that stops rot, warping, and splintering. In addition, quality protective finishes enhance raw wood grain while extending outdoor deck lifespans by decades.
Many homeowners feel confused by the vast array of clear sealers, semi-transparent stains, and solid acrylic coatings available. Fortunately, following a methodical preparation workflow guarantees deep coating penetration without peeling or sticky residue. Therefore, investing time in proper wood restoration protects your backyard living investment significantly. When coordinated with safety upgrades like learning how to install deck railing, your entire outdoor living area feels cohesive. Consequently, mastering deck staining and sealing delivers durable, showroom-quality outdoor entertainment spaces effortlessly.
Understanding Deck Staining and Sealing: Crucial Differences and Benefits.
While people often use the terms interchangeably, staining and sealing serve distinct wood protection functions. Specifically, wood stain contains rich color pigments that penetrate wood cellular pores and block damaging ultraviolet radiation. Conversely, a clear sealer provides a water-repellent barrier that forces rain to bead on the surface. Moreover, combination stain-and-seal formulas blend rich trans-oxide pigments with flexible water-repellent polymers. In addition, sealed deck boards resist mildew staining and outdoor barbecue grease spills. Consequently, combining deck staining and sealing offers the ultimate dual defense against nature.
| Treatment Formulation. | Pigment Level. | UV Solar Defense. | Moisture Repellency. | Reapplication Interval. |
|---|---|---|---|---|
| Clear Protective Sealer. | Zero Pigment. | Minimal Protection. | High Water Beading. | Every 1 Year. |
| Semi-Transparent Stain. | Moderate Tint. | Strong UV Blocking. | Excellent Barrier. | Every 2 to 3 Years. |
| Semi-Solid Oil Stain. | Heavy Color Hide. | Superior UV Defense. | Maximum Shield. | Every 3 to 4 Years. |
| Solid Acrylic Stain. | Opaque Paint Look. | Maximum Sun Block. | Total Surface Film. | Every 4 to 5 Years. |
1. Deep Cleaning and Stripping: Removing Weathered Wood Fibers.
Before applying fresh finish, you must strip away gray oxidized wood fibers, mold, and old peeling sealers. First, sweep the deck thoroughly and remove all patio furniture, grills, and potted plants. Next, saturate the dry deck with an eco-friendly sodium percarbonate wood cleaner using a garden pump sprayer.
Allow the cleaning solution to dwell on wood planks for fifteen to twenty minutes. Scrub stubborn mildew stains and barbecue grease spots vigorously using a stiff-bristle synthetic deck brush. Furthermore, rinse the surface with a wide-fan pressure washer tip held twelve inches away from boards. Therefore, removing surface contaminants establishes a clean foundation for subsequent coating absorption.
2. Wood Brightening and pH Balancing: Restoring Natural Timber Glow.
High-alkaline wood cleaners and chemical strippers darken timber tannins, leaving wood boards looking dull and brown. Applying an oxalic acid wood brightener neutralizes the alkaline pH balance and opens closed wood cellular pores. This vital step restores the luminous golden honey tones of cedar, redwood, and southern pine.
Spray the diluted brightener evenly across damp deck boards and railing balusters. Let the acid foam react for ten minutes before rinsing thoroughly with clean garden hose water. Moreover, brightening improves stain pigment acceptance, ensuring uniform color distribution without blotchy patches. Consequently, chemical neutralization produces professional, magazine-worthy wood finishing results.
3. Thorough Mechanical Sanding: Smoothing Scratches and Raised Grain.
Power washing and heavy chemical cleaning inevitably raise delicate wood fibers, creating a fuzzy, rough texture. Once the deck dries completely, smooth all walking surfaces using an orbital floor sander or random orbital hand sander. Use eighty-grit sandpaper for deck floorboards and one-hundred-grit paper for smooth handrails.
Sand strictly in the direction of the natural wood grain to prevent unsightly cross-grain scratches. Furthermore, check for protruding deck screws or popped ring-shank nails and drive them beneath the wood surface. Vacuum all lingering sanding dust carefully before opening your stain containers. Ultimately, smooth sanding ensures safe barefoot walking comfort while maximizing coating adhesion.
4. The Water Drop Test: Confirming Complete Moisture Evaporation.
Applying stain onto damp wood traps moisture beneath the surface, causing milky discoloration and rapid peeling. Test moisture levels by sprinkling a dozen water droplets across several high-traffic deck boards. If the water absorbs immediately into the wood pores, the timber is ready for finish application.
However, if water droplets bead up tightly, old sealer remains or the wood is too wet. Allow wet lumber to dry under clear sunny skies for at least forty-eight continuous hours. In addition, pair your refurbished deck with a cozy retaining wall block fire pit to create the ultimate backyard gathering zone. Therefore, confirming wood porosity prevents costly finish failures.
5. Applying Penetrating Wood Stain: Back-Brushing for Deep Saturation.
Begin application along perimeter edges, fascia boards, and vertical deck railing balusters using a three-inch natural bristle brush. Next, apply stain across deck floorboards using a high-density car wash sponge, pad applicator, or pump sprayer. Always work along two or three full board lengths continuously from end to end.
Immediately follow roller or sprayer application with back-brushing to force wet stain deep into grain crevices. Back-brushing eliminates surface pooling, lap marks, and uneven color splotches. In addition, wipe away excess unabsorbed stain with lint-free cotton rags within twenty minutes. Consequently, disciplined application creates rich, streak-free deck staining and sealing perfection.
6. Applying Protective Sealer: Locking in Long-Term Weather Defense.
If you used a standalone wood dye or semi-transparent oil stain, apply a dedicated waterproof sealer topcoat. Wait twenty-four hours after staining to allow oil carriers and pigments to cure fully inside the wood fibers. Roll on a thin, even layer of silicone or polyurethane-fortified acrylic sealer across all deck surfaces.
Ensure sealer coats penetrate end-grain cuts and board expansion gaps where standing water collects easily. Moreover, modern sealers contain trans-oxide pigments and mold inhibitors that resist outdoor humidity. In addition, sealed surfaces repel red wine spills, dropped food oils, and falling autumn leaf stains. Therefore, a durable top sealer preserves your deck against aggressive weather cycles.
7. Maintaining Proper Curing Conditions: Maximizing Coating Longevity.
Freshly stained and sealed outdoor decks require uninterrupted curing time before withstanding foot traffic and heavy patio furniture. Keep children and household pets off the treated deck for at least twenty-four to forty-eight hours. Furthermore, wait a full seventy-two hours before sliding heavy steel dining tables and gas grills back into place.
Place protective silicone glides under all furniture legs to prevent scratching the new protective finish. In addition, perform routine seasonal sweeping and wash away autumn pollen with mild soapy water twice yearly. Inspect high-traffic stair treads annually and apply thin maintenance coats whenever water stops beading. Following these guidelines ensures your deck staining and sealing project remains flawless for years.
Optimal Temperature and Weather Guidelines for Deck Staining.
Applying deck finishes under improper weather conditions ruins even the highest-grade protective coatings. Always schedule your staining project during dry weather with moderate ambient temperatures between fifty and eighty-five degrees Fahrenheit.
Avoid staining in direct blistering midday sunlight because intense heat flash-dries stain solvents too quickly. Rapid drying creates uneven lap lines, surface blistering, and poor wood grain penetration. Instead, follow the natural shade around your home or work during calm morning hours. Adhering to temperature recommendations guarantees superior finish bonding and deep wood absorption.
Common Deck Finishing Mistakes to Avoid.
Many enthusiastic DIY homeowners make preventable mistakes that lead to premature coating breakdown. Avoiding these common pitfalls protects your investment and ensures professional-quality results:
- Staining Over Wet Lumber: Trapped moisture causes blistering, cloudy hazing, and severe topcoat peeling.
- Skipping Chemical Wood Brightener: Neglecting pH balancing leaves wood dark and prevents uniform pigment penetration.
- Over-Applying Thick Stain Layers: Heavy coats form gummy surface puddles that never cure properly.
- Ignoring End Grain Cuts: Exposed board ends absorb moisture rapidly unless sealed thoroughly with extra finish.
Frequently Asked Questions About Deck Staining and Sealing.
Q1: Should you stain or seal a deck first?
Always apply penetrating stain first to color the wood, followed by a waterproof sealer topcoat.
Q2: How long does a deck need to dry before staining?
New or washed pressure-treated lumber requires forty-eight hours of dry, sunny weather before staining.
Q3: Is oil-based stain better than water-based stain for decks?
Oil-based stains penetrate deeper into dense wood grains, while water-based acrylic stains offer superior UV color retention.
Q4: How often should you stain and seal a wood deck?
Reapply clear sealers annually and reapply semi-transparent penetrating stains every two to three years.
Conclusion: Enjoy a Weatherproof Outdoor Sanctuary.
In conclusion, completing a methodical deck staining and sealing project rejuvenates your entire outdoor living landscape. By thoroughly stripping old coatings, brightening wood tannins, and back-brushing penetrating finishes, you ensure enduring beauty. Remember to respect proper curing timelines, check wood moisture levels, and protect end grain cuts diligently. Follow these proven steps for deck staining and sealing to enjoy a breathtaking backyard paradise all year.
Visit sageandshelf for more details.