How to Install Deck Railing: 7 Easy Steps & Code Tips
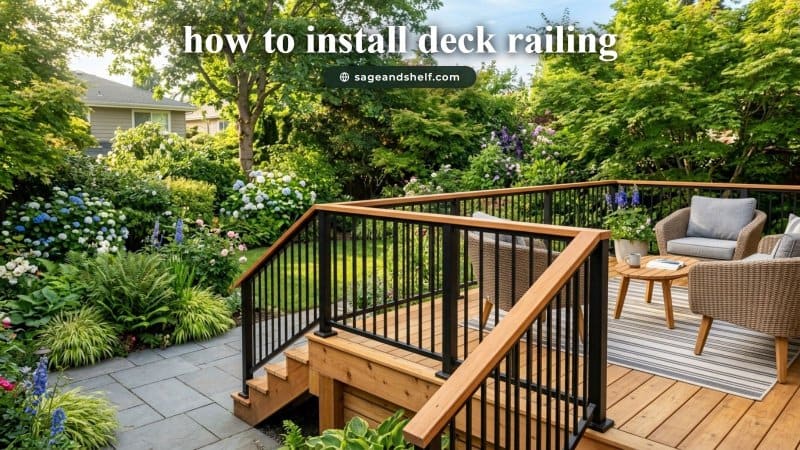
An open backyard platform transforms into a secure retreat once sturdy railings are anchored. When building a deck, barriers protect gatherings. Specifically, mastering how to install deck railing ensures structural stability and code compliance. Furthermore, combining cedar rails with aluminum balusters introduces modern elegance. In addition, layout planning prevents wobbly posts.
Many homeowners feel intimidated by building codes and baluster calculations. Rather than hiring expensive contractors, straightforward framing methods make this project manageable. Therefore, learning how to install deck railing empowers you to upgrade outdoor spaces affordably. With basic tools, installations finish quickly. Consequently, your deck provides lasting peace.
What Is Deck Railing Installation and Why Is Code Critical?
Learning how to install deck railing requires mounting four-by-four posts, attaching support rails, and securing vertical balusters. Following municipal codes ensures guardrails withstand two hundred pounds of outward force, preventing falls on elevated decks.
Moreover, proper framing techniques prevent wood rot around bolt penetrations. In addition, code-compliant baluster spacing prevents children from slipping through openings. Consequently, understanding how to install deck railing protects property value and safety.
| Railing System Material. | Average Cost Per Linear Foot. | Maintenance Level. | Typical Lifespan. |
|---|---|---|---|
| Pressure-Treated Pine. | $18 to $28. | Annual sealing & staining. | 10 to 15 Years. |
| Natural Western Red Cedar. | $30 to $48. | Biennial oil finishes. | 15 to 20 Years. |
| Powder-Coated Aluminum. | $45 to $75. | Occasional soap wash. | 25+ Years. |
| Composite & Cable Wire. | $60 to $110. | Minimal wash & tension check. | 25+ Years. |
Step 1: Verify Local Height and Infill Building Codes.
Building codes establish mandatory guardrail dimensions for elevated platforms. Residential codes typically require thirty-six-inch railing height for decks elevated above thirty inches. However, higher balconies often mandate forty-two-inch heights.
Furthermore, the four-inch sphere rule dictates balusters cannot allow spheres through. In addition, bottom sweep spaces beneath lower rails must remain under four inches. Therefore, reviewing codes before starting prevents inspection failures.
Step 2: Anchor Structural Corner and Intermediate Posts.
Wobbly posts represent dangerous failures on residential decks. To begin, space posts under six feet apart along perimeters. Secure each timber post inside rim joists using two half-inch galvanized carriage bolts.
| Framing Component. | Specified Hardware. | Estimated Cost. | Primary Structural Function. |
|---|---|---|---|
| Corner Post Mounts. | 1/2-Inch x 8-Inch Carriage Bolts. | $3 to $5 each. | Anchors posts to rim joists. |
| Tension Hold-Downs. | DTT2Z Structural Brackets. | $8 to $12 each. | Resists outward leverage forces. |
| Infill Balusters. | 3/4-Inch Round Aluminum Tubes. | $2 to $4 each. | Prevents fall-through accidents. |
| Rail Screws. | 3-Inch Exterior Ceramic Screws. | $12 per pack. | Fastens rails to posts securely. |
Specifically, install metal tension tie brackets beneath framing to counteract outward leverage. Drill pilot holes through joists and posts before tapping carriage bolts into place. In addition, use a level to verify plumb alignment before tightening nuts. Ultimately, solid anchoring forms the foundation of how to install deck railing.
Step 3: Measure and Cut Top and Bottom Support Rails.
Inaccurate rail lengths create unsightly gaps and weaken lateral support. Measure distances between adjacent posts at both levels. Use a miter saw equipped with a fine-tooth blade to make clean cuts.
Next, clamp rails together to mark connector locations simultaneously. Synchronized layout marks ensure balusters stand vertical once assembled. In addition, sand cut ends smooth and apply wood preservative to end grain. Consequently, precise cutting simplifies how to install deck railing immensely.
Step 4: Calculate Balanced and Code-Compliant Baluster Layouts.
Uneven baluster spacing disrupts visual symmetry across spans. To calculate spacing, subtract total baluster widths from overall span and divide by spaces. Aim for three-and-a-half-inch gaps between balusters to satisfy safety codes comfortably.
For instance, screw round plastic connectors along pencil marks using exterior wood screws. Fastening connectors beforehand eliminates awkward toe-nailing between narrow spindles. In addition, check end gaps so outer spaces remain equal. Therefore, balanced layout calculations streamline how to install deck railing seamlessly.
Step 5: Assemble the Rail Section on a Flat Work Surface.
Assembling components in the air causes frustrating misalignment. Instead, lay your pre-drilled bottom rail flat across saw horses. Slide each aluminum or timber baluster firmly onto its bottom connector.
Next, align top rail connectors over exposed baluster ends, pressing down evenly. Tap the top rail gently with a rubber mallet until all balusters seat fully into place. In addition, drive locking screws through connectors to secure spindles. Consequently, pre-assembling panels accelerates how to install deck railing.
Step 6: Mount the Pre-Assembled Rail Section Between Posts.
Lifting pre-assembled railing panels between posts requires temporary support blocks. Place three-inch scrap blocks on deck boards beneath rail ends. Rest the assembled panel on support blocks, centering it between posts.
Next, secure rails to posts using structural metal mounting brackets. Drive three-inch exterior screws through bracket holes directly into post centers. In addition, check rails with a level before driving final fasteners. Ultimately, secure bracket mounting ensures your how to install deck railing project feels rigid.
Step 7: Install Top Drink Caps and Weatherproof Post Tops.
Adding a flat horizontal top rail creates a convenient resting surface for drinks. Fasten a smooth two-by-six cedar board horizontally across post tops and upper rails. Drive countersunk screws from underneath to hide fastener heads.
Furthermore, install decorative aluminum post caps over exposed end grain to prevent rot. Sealed caps shield wood from rain and sun exposure. In addition, apply exterior stain across wood surfaces. Therefore, protective caps finish how to install deck railing with lasting durability.
Common Deck Railing Mistakes to Avoid Proactively.
Even dedicated builders make preventable framing errors when learning new techniques. For instance, notching four-by-four posts to fit over rim joists severely weakens timber strength. Always mount unnotched posts inside joist framing using approved structural hardware.
Another frequent error is relying solely on standard screws instead of structural bolts. In contrast, heavy carriage bolts withstand required two-hundred-pound guardrail impact forces without failing. By avoiding these common errors, your how to install deck railing project satisfies safety inspectors.
Long-Term Aesthetic Appeal and Outdoor Entertaining Value.
Investing a weekend into building sturdy deck railings elevates exterior aesthetic and resale appeal. In fact, clean railing lines frame outdoor spaces beautifully, creating a welcoming environment. Quality materials withstand decades of harsh seasonal weather.
Afterward, relaxing on a secure and stylish deck brings immense daily enjoyment. Consequently, taking time to master how to install deck railing creates an enduring home improvement asset.
Frequently Asked Questions About Deck Railing Installation.
Q1: What is the maximum distance between deck railing posts?
Standard residential building codes recommend spacing structural posts no more than six to eight feet apart.
Q2: How high should residential deck railings be?
Most building codes require railings to be at least thirty-six inches high for decks elevated thirty inches above ground.
Q3: Can I attach deck posts to the outside of the rim joist?
Inside mounting is structurally preferred because it resists outward lateral leverage forces far more reliably than outside mounting.
Conclusion: Build a Safe and Beautiful Outdoor Deck.
In summary, constructing a code-compliant deck guardrail combines rigid post anchoring, precise baluster spacing, and weather-resistant materials. By reviewing building codes, assembling panels on flat surfaces, and adding protective post caps, you create an extraordinary sanctuary. Embrace these carpentry methods, master how to install deck railing, and enjoy your deck with confidence.
Visit sageandshelf for more details.