How to Wet Sand Drywall: 7 Best Dust-Free DIY Steps
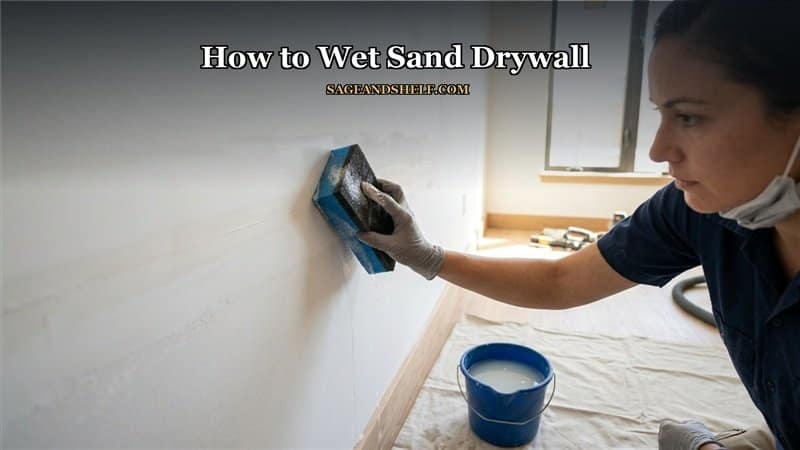
Achieving flawless, velvety smooth wall surfaces during interior remodeling often creates frustrating clouds of fine airborne dust. When finishing modern drywall panels, traditional dry sanding coats every room in gritty white powder. Rather than spending hours sealing doorways and wiping furniture, sponge finishing provides a clean alternative. Specifically, learning how to wet sand drywall enables homeowners to feather joint compound seamlessly without airborne mess. In addition, dust-free wall preparation protects indoor air quality and HVAC systems throughout your home.
Many DIY renovators worry that wet sponges might gouge soft mud or dissolve paper drywall tape. Fortunately, using proper sponge moisture levels and gentle circular pressure guarantees glass-like seams. Therefore, mastering damp sanding techniques saves extensive cleanup time while delivering professional results. When paired with a comprehensive house renovation guide, your living space transformation proceeds smoothly. Consequently, discovering how to wet sand drywall delivers showroom-quality wall prep effortlessly.
What Is Wet Sanding Drywall and Why Choose This Method?
Wet sanding is a dust-free finishing technique that uses a damp, high-density abrasive sponge to smooth joint compound. Learning how to wet sand drywall softens high mud ridges and feathers seams into surrounding wallboard without creating dust. Moreover, this method eliminates the need for bulky vacuum respirators and plastic containment barriers. In addition, sponge finishing avoids scuffing or tearing delicate paper facing around recessed screw holes. Consequently, mastering this approach combines superior living comfort with pristine residential wall finishes.
| Sanding Method. | Dust Generation. | Mess Containment. | Best Application Use. |
|---|---|---|---|
| Wet Sponge Sanding. | Zero Airborne Dust. | Single Floor Drop Cloth. | Final Coats & Small Remodels. |
| Traditional Sandpaper. | Heavy Airborne Dust. | Full Plastic Room Sealing. | Heavy Initial Mud Shaping. |
| Mesh Screen Sanding. | Moderate Fine Dust. | HEPA Vacuum Attachments. | Fast Joint Leveling. |
| Orbital Power Sanding. | Extreme Fine Dust. | Commercial Dust Extractors. | New Construction Production. |
Step 1: Gather Specialized Dual-Sided Drywall Sponges and Clean Water.
Standard household kitchen sponges are too soft and deteriorate quickly against gritty gypsum mud. Instead, purchase specialized drywall finishing sponges featuring a dense foam core with coarse and smooth sides. The coarse abrasive side shapes ridges, while the smooth foam side polishes seams.
First, fill two five-gallon plastic buckets with lukewarm clean tap water. Designate one bucket for initial sponge rinsing and the second bucket for clean final dipping. Next, lay heavy canvas drop cloths along the baseboards to catch accidental water drips. In addition, keep clean microfiber towels nearby to wipe your hands regularly. Therefore, gathering the right tools forms the foundation of how to wet sand drywall successfully.
Step 2: Allow Joint Compound to Cure Completely Before Wet Sanding.
Attempting to damp sand wet or tacky joint compound will liquefy the mud and leave hollow gouges. Standard all-purpose mud requires at least twenty-four hours of drying time under normal room temperatures. Furthermore, high indoor humidity can extend required curing times noticeably.
Test the mud firmness by pressing a fingernail gently into the thickest seam section. The compound should feel completely hard, chalky, and dry without cool dampness. In addition, scrape away any prominent tool ridges using a six-inch metal joint knife before introducing water. Consequently, ensuring thorough curing prevents accidental mud erosion during sponge finishing.
Step 3: Saturate and Wring Out Your Sponge to Damp Consistency.
Excessive water dripping down finished drywall will stain paper facing and soften underlying paper tape. Submerge your dual-sided drywall sponge into your clean water bucket until fully saturated. Next, squeeze the sponge firmly with both hands over the bucket until no water drips freely.
The sponge must remain uniformly damp to the touch without leaking moisture when pressed. Holding a wet sponge with excess water causes messy streaks that require extra patching later. In addition, inspect the sponge face to ensure no dried grit remains from previous passes. Therefore, precise moisture control is an essential milestone when discovering how to wet sand drywall.
Step 4: Feather High Seam Edges with Broad Circular Movements.
The outer perimeter edges of joint compound require gradual thinning to blend invisibly into surrounding wallboard. First, place the coarse side of your damp sponge flat against the outer edge of the dried seam. Apply light, consistent pressure using broad overlapping circular hand motions.
The damp abrasive surface gently dissolves the thin outer mud ridges without scratching nearby paper facing. Work along the entire border of the joint, wiping away dissolved mud slurry with a wrung-out sponge. In addition, avoid pressing hard on center tape lines to prevent exposing fiber mesh. Consequently, circular feathering creates an undetectable transition across your wall surfaces.
Step 5: Smooth Seam Centers with Light Linear Feathering Strokes.
Once the perimeter borders blend seamlessly, focus on polishing the broad center surface of the mud joint. Flip your drywall sponge over to the smooth, fine-pore foam finishing side. Wipe the center seam using long, continuous horizontal or vertical strokes that follow the joint direction.
Keep your wrist flexible and glide the sponge lightly over screw divots and tape seams. The smooth damp foam buffs out micro-ridges and leaves a burnished, satin surface. Furthermore, blending wall seams seamlessly prepares surfaces for sophisticated designer paints like pale oak paint color in modern living spaces. Ultimately, linear buffing guarantees flawless wall flatness under bright natural light.
Step 6: Rinse and Refresh Cleaning Buckets to Prevent Mud Streaks.
As you smooth multiple wall seams, joint compound slurry quickly accumulates inside your sponge pores. A clogged sponge smears muddy paste back onto clean drywall, creating uneven surface ripples. First, submerge the sponge into your rinse bucket every two minutes and knead it thoroughly.
Squeeze out the dirty water, dip into the clean water bucket, and wring dry again. Replace bucket water completely whenever it becomes cloudy and opaque with gypsum sediment. In addition, wipe adjacent baseboards with a clean damp cloth before dropped mud droplets dry. Therefore, maintaining clean water ensures crisp, professional finishing on every pass.
Step 7: Inspect with Raking Work Lights Before Final Priming.
Inspecting your finished walls under direct overhead light often hides subtle dips, hollows, and high ridges. Instead, hold a bright handheld LED work light flat against the wall surface at a sharp angle. This raking side lighting casts long shadows across any remaining imperfections.
Mark minor low spots lightly with a pencil and apply a paper-thin skim coat of lightweight compound. Allow touch-ups to cure for two hours, then touch them up with your damp sponge. In addition, let the entire room dry for twenty-four hours before rolling on quality drywall primer sealer. Following these steps proves that learning how to wet sand drywall delivers breathtaking, dust-free home walls.
Common Drywall Wet Sanding Mistakes to Avoid.
Beginner DIYers often press too aggressively on the sponge, washing away too much compound and exposing drywall tape. Always let the moisture dissolve the mud gradually rather than forcing mechanical abrasion. Gentle pressure preserves necessary mud thickness over recessed fasteners.
Another frequent error is skipping high-build drywall primer before applying satin or semi-gloss wall paint. Drywall compound absorbs paint differently than surrounding paper facing, leading to flashing sheen variations. By applying dedicated drywall primer-sealer, your finished paint coat looks completely uniform and luxurious.
Frequently Asked Questions About How to Wet Sand Drywall.
Q1: Can you wet sand setting-type hot mud?
Chemical setting-type mud dries extremely hard through chemical reaction and does not dissolve easily with water. Use standard pre-mixed joint compound for wet sanding.
Q2: Is wet sanding drywall better than dry sanding?
Wet sanding is significantly cleaner because it produces zero airborne dust, making it ideal for occupied homes.
Q3: How many coats of joint compound do you need before wet sanding?
Apply two to three thin coats of joint compound with wide taping knives before your final wet sand pass.
Q4: How long does a wall take to dry after wet sanding?
Because the sponge is only damp, wall moisture evaporates completely within two to four hours.
Conclusion: Enjoy Dust-Free Smooth Walls with Ease.
In summary, finishing home walls without suffocating dust clouds is one of the most satisfying DIY achievements. By selecting dual-sided drywall sponges, controlling moisture levels, and blending outer seam edges with circular strokes, you create flawless surfaces. Follow these practical steps on how to wet sand drywall. Prepare your rooms with confidence and enjoy stunning painted walls for years to come.
Visit sageandshelf for more details.