Molding for Kitchen Cabinets: 7 Best Styles & Pro Tips
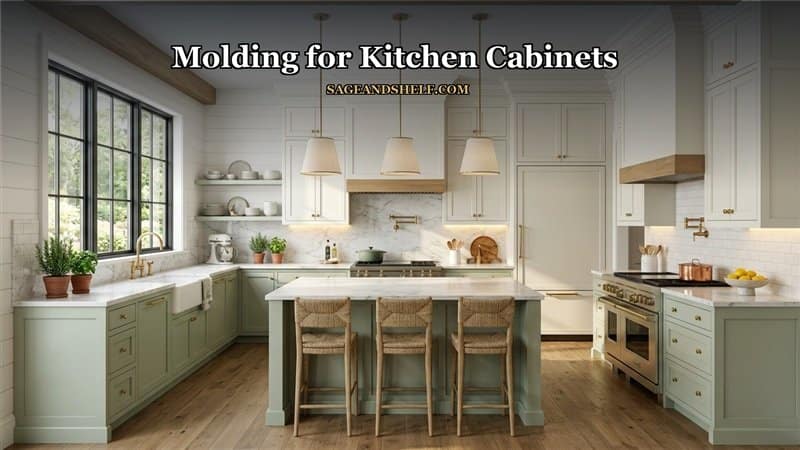
Upgrading kitchen cabinetry transforms the entire visual tone of your home without requiring full replacement. When installing decorative crown molding profiles, standard builder boxes gain custom appeal. Specifically, choosing the right molding for kitchen cabinets bridges awkward ceiling gaps and hides under-cabinet lights. In addition, architectural trim creates seamless transitions between vertical wall surfaces and upper cabinetry.
Homeowners often struggle to choose the perfect profile matching their architectural interior aesthetic. Fortunately, selecting appropriate trim styles elevates traditional, shaker, and modern kitchens alike. Therefore, adding architectural details increases overall home property value significantly. When paired with timeless cabinetry styles like a raised panel door, your entire kitchen feels custom crafted. Consequently, discovering the right molding for kitchen cabinets delivers breathtaking culinary spaces effortlessly.
Understanding Molding for Kitchen Cabinets: Purpose and Value.
Cabinet trim serves both practical functional needs and crucial aesthetic purposes across modern kitchens. Specifically, molding for kitchen cabinets covers uneven drywall seams and seals dusty gaps above upper boxes. Moreover, architectural trim prevents grease and dust accumulation in hard-to-reach cabinet tops. In addition, decorative molding provides sturdy backing for under-cabinet task lighting systems. Consequently, investing in quality trim creates clean, professional woodworking lines throughout your space.
| Molding Profile Type. | Primary Function. | Ceiling Height Match. | Installation Difficulty. |
|---|---|---|---|
| Traditional Crown Trim. | Ceiling Transition. | 9-Foot or 10-Foot Ceilings. | Intermediate Miter Cuts. |
| Flat Shaker Crown. | Modern Linear Finish. | 8-Foot to 9-Foot Ceilings. | Beginner Butt Joints. |
| Bottom Light Rail. | Conceals LED Fixtures. | All Standard Heights. | Beginner Simple Cuts. |
| Base Toe Kick Trim. | Protects Bottom Base. | Floor Level Cabinets. | Beginner Straight Cuts. |
1. Classic Crown Molding: Bridging Cabinets to the Ceiling.
Traditional crown molding features curved, sweeping profiles that draw eyes upward toward the ceiling. First, install ceiling crown to eliminate empty dead zones above upper cabinet boxes. This technique creates a grand, built-in appearance reminiscent of high-end custom homes.
Select two-piece or three-piece crown assemblies for dramatic vertical ceiling height. Furthermore, layered trim profiles complement ornate corbels and decorative fluted wall panels beautifully. In addition, pre-painted white trim blends seamlessly with classic cottage style interiors. Therefore, traditional crown remains the premier choice for formal kitchen elegance.
2. Flat Shaker Crown Molding: Crisp Geometric Simplicity.
Modern farmhouse and transitional kitchens demand clean, unadorned trim lines. Instead of ornate curves, flat shaker crown features sharp ninety-degree angles and flat fascia boards. This minimalist profile emphasizes clean geometry and understated functional sophistication.
Fasten flat hardwood trim flush against upper cabinet frames using fine brad nails. Moreover, simple square profiles require straightforward butt joints rather than complex compound miter angles. In addition, shaker molding integrates smoothly into modern fall cottagecore kitchen ideas for cozy living. Consequently, shaker molding delivers fresh, uncluttered luxury to modern culinary environments.
3. Light Rail Molding: Concealing Under-Cabinet Fixtures.
Under-cabinet LED strip lights and puck fixtures provide vital task lighting over countertops. However, exposed wiring harnesses and bare LED diodes create unpleasant visual glare. Installing bottom light rail molding along the lower cabinet edge solves this problem cleanly.
Select one-inch to two-inch hardwood trim matching your cabinet door stain. Next, fasten the light rail trim directly to the bottom cabinet frame face. The bottom lip shields seated guests from direct light bulb glare effectively. Therefore, light rail trim combines vital functional concealment with refined decorative framing.
4. Base Toe Kick Molding: Grounding Lower Cabinetry.
Base cabinets experience constant foot traffic, moisture spills, and vacuum cleaner collisions. Standard recessed toe kicks often collect dirt and expose rough cabinet sub-assemblies. Adding finished base molding or furniture-style feet creates substantial visual weight and architectural grounding.
Choose moisture-resistant base shoe trim that seals tightly against finished kitchen flooring. Furthermore, furniture-style base valances transform standard island cabinets into standalone furniture centerpieces. In addition, continuous toe kick covers make routine floor sweeping noticeably faster. Ultimately, lower base trim protects cabinet boxes while completing your room aesthetic.
5. Riser Blocks and Fascia Extensions: Conquering Tall Ceilings.
When kitchen cabinets stop twelve inches below the ceiling, standard crown cannot bridge the span alone. Instead, professional carpenters install vertical riser blocks or flat fascia extensions above upper boxes. The crown molding then mounts directly to the top edge of this extended fascia.
First, measure the exact vertical distance between your cabinet tops and drywall ceiling. Next, build a sturdy hardwood nailer box to support the riser boards securely. Fasten the crown profile at the ceiling line to create a two-tiered stacked effect. Consequently, stacked cabinet moldings create a seamless floor-to-ceiling custom installation.
6. Scribe Molding: Hiding Uneven Walls and Wavy Drywall.
Residential drywall walls and plaster ceilings are rarely perfectly straight or plumb. When flat cabinet trim meets a wavy wall, unsightly gaps appear along the joint. Thin, flexible scribe molding bends slightly to cover these inconsistent wall gaps effortlessly.
Hold the scribe molding strip firmly against the wall and trace the surface contour with a compass. Next, plane or sand along the pencil line to produce a custom contour match. Finally, pin the trim in place with twenty-three-gauge micro pins for invisible fastening. Therefore, scribe molding guarantees airtight transitions even on uneven vintage walls.
7. Corner and Edge Fillers: Polishing Cabinet Seams.
Corner cabinets and appliance cutouts often leave raw plywood edges exposed to view. Applying decorative corner bead trim and edge fillers creates polished exterior transitions. These slim trim profiles protect high-wear cabinet edges from chipping during daily kitchen activities.
Match corner trim species and stain formulation exactly to your cabinet face frames. In addition, use color-matched wood putty to conceal all nail holes before applying clear lacquer. Furthermore, outside corner moldings prevent accidental snags on clothing during busy meal prep. Consequently, finishing every seam ensures a flawless, high-end cabinet installation.
Pro Measurement and Miter Saw Cutting Tips.
Accurate compound miter cuts require careful planning, proper blade selection, and sharp tools. Always use an eighty-tooth carbide miter saw blade to prevent splintering delicate cabinet finishes. In addition, cut test pieces from scrap wood before trimming expensive hardwood profiles.
Remember that crown molding rests against the saw fence upside down and backward during standard cuts. Alternatively, use a specialized crown molding jig to hold trim at its exact spring angle. Furthermore, apply quality wood glue at every miter joint to prevent seasonal separation. Following these cutting techniques guarantees tight, hairline joints across every corner.
Common Kitchen Cabinet Trim Mistakes to Avoid.
Many beginner DIY renovators make common installation mistakes that compromise their finished results. Avoiding these frequent errors saves time, money, and costly hardwood material waste.
- Skipping Solid Nailer Backing: Crown molding requires sturdy wooden backer blocks fastened above cabinet boxes.
- Ignoring Ceiling Out-of-Level Slopes: Always measure ceiling heights at multiple room points before ordering trim.
- Using Excessive Fastener Size: Heavy sixteen-gauge finish nails split thin molding profiles easily.
- Forgetting Wood Acclimation: Allow hardwood trim to acclimate inside your home for forty-eight hours.
Frequently Asked Questions About Molding for Kitchen Cabinets.
Q1: What is the most popular molding for kitchen cabinets?
Classic crown molding and flat shaker trim are the two most popular styles today.
Q2: Should cabinet molding touch the ceiling?
Extending molding to touch the ceiling creates a custom built-in look and eliminates dusty gaps.
Q3: Can you add molding to existing builder-grade cabinets?
Yes, adding aftermarket crown and light rail trim instantly upgrades standard builder-grade cabinets affordably.
Q4: What nail gauge is best for cabinet trim?
Use eighteen-gauge brad nails or twenty-three-gauge micro pins for delicate cabinet molding installation.
Conclusion: Elevate Your Culinary Space with Custom Cabinet Trim.
In conclusion, adding decorative trim is one of the most rewarding kitchen upgrades available. By selecting complementary crown profiles, practical light rails, and sturdy base trim, you create enduring elegance. Remember to measure carefully, use solid backer blocks, and test miter angles before final assembly. Follow these professional techniques for molding for kitchen cabinets to enjoy a luxurious culinary sanctuary.
Visit sageandshelf for more details.


