Building Picture Frames: 7 Best DIY Woodworking Tips
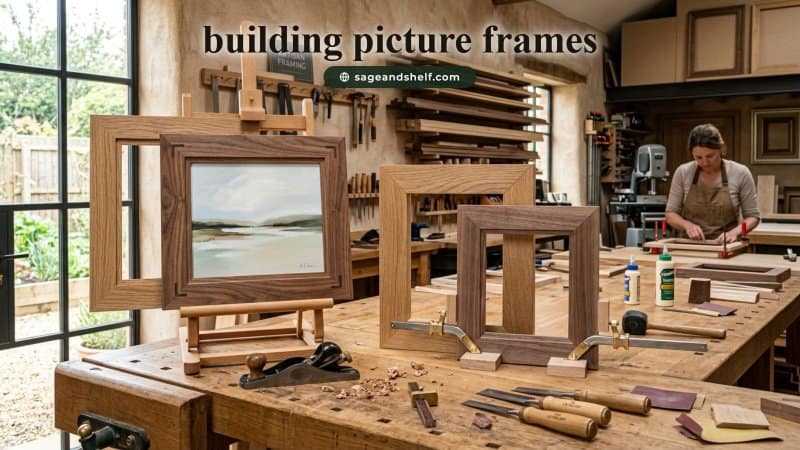
Crafting custom wall decor preserves memories while adding architectural elegance. When designing bespoke picture frame display, woodworking elevates ordinary art into stunning centerpieces. Specifically, mastering building picture frames enables artisans to produce durable heirloom casings. Furthermore, handmade timber borders accentuate canvas prints effectively. In addition, thoughtful joinery ensures structural stability.
Over years of woodworking, bespoke moldings remain a rewarding workshop project. Rather than settling for composite moldings, solid timber creates an artisanal atmosphere. Therefore, learning the techniques of building picture frames empowers enthusiasts to craft museum-grade wall presentations. With proper miter calibration and spline reinforcement, gallery walls achieve timeless sophistication. Consequently, curated artwork receives exceptional protection.
The Core Fundamentals of Custom Wood Framing.
Every remarkable timber display begins with selecting high-grade lumber and understanding geometry. In fact, calculating proper rabbet depth prevents assembly errors. Instead of rushing cuts, prepare timber stock methodically.
Furthermore, matching wood grain patterns across adjoining corners establishes seamless visual flow. Specifically, selecting quarter-sawn white oak introduces rich organic character. In addition, cutting accurate sightlines keeps artwork centered. Consequently, dedicated building picture frames projects yield exquisite results.
| Timber Species. | Grain Density. | Recommended Profile Width. | Ideal Art Format. |
|---|---|---|---|
| Solid White Oak. | High Density Hardwood. | 1.5 to 2.5 Inches. | Heavy canvas paintings. |
| American Black Walnut. | Medium-High Density. | 1.0 to 2.0 Inches. | Fine art photography. |
| Hard Rock Maple. | Very Dense Hardwood. | 0.75 to 1.5 Inches. | Modern minimalist prints. |
| Black Cherry Timber. | Fine Closed Grain. | 1.25 to 2.25 Inches. | Vintage botanical sketches. |
Also Read: Home Exterior Hacks Sage and Shelf: 7 Best Ideas 2026
Tip 1: Choose Stable Hardwood Stock with Straight Grain.
Selecting bowed timber boards causes frustrating corner gaps during glue assembly. In contrast, experienced woodworkers inspect hardwood stock to verify straight grain alignment. As a result, straight boards produce crisp mitered seams reliably.
Specifically, allow rough timber to acclimate before milling. Furthermore, face-joint and plane all timber surfaces to guarantee squareness. In addition, sorting grain direction around frame perimeters creates harmonious borders. Therefore, careful lumber selection simplifies building picture frames remarkably.
Tip 2: Calibrate Your Miter Saw for Flawless Forty-Five Degree Cuts.
Even a tiny discrepancy on miter cuts causes gaps when joining corners. However, calibrating chop saws with precision digital gauges ensures airtight joints. Always execute test cuts on scrap timber beforehand.
For instance, construct a dedicated wooden miter sled equipped with stop blocks. Furthermore, cut opposing frame rails in pairs to guarantee identical side lengths. In addition, using eighty-tooth carbide blades eliminates surface tear-out. Consequently, precise mitering makes building picture frames deeply satisfying.
Tip 3: Rout Clean Rabbet Profiles for Glass and Artwork.
A recess known as a rabbet holds protective glazing, matboard, and art prints securely. In contrast to shallow grooves, a half-inch rabbet accommodates multiple mat layers. Properly milled channels guarantee smooth component insertion.
Specifically, use a table router with a bearing-guided rabbeting bit for consistent depth. Furthermore, mill rabbet grooves into timber moldings before cutting corner miters. In addition, sand inner channels smooth to protect glass edges. Therefore, accurate rabbets remain essential when building picture frames.
Tip 4: Utilize Corner Clamping Jigs for Square Assembly.
Attempting to hold glued miter joints by hand leads to slipped corners and uneven seams. Instead, professional craftsmen employ band clamps or vises to distribute pressure. Uniform pressure draws miter surfaces together tightly.
For instance, apply polyvinyl acetate wood glue evenly across both mating miter faces. Furthermore, wipe away squeezed adhesive immediately using a damp cloth. In addition, measure opposite diagonals with tape to confirm rectangular squareness. Consequently, sturdy clamping streamlines building picture frames effortlessly.
Tip 5: Reinforce Miter Corners with Decorative Wood Splines.
Standard end-grain miter joints possess limited strength and can split from seasonal expansion. In contrast, inserting wooden corner splines creates substantial long-grain glue surface area. Hardwood splines lock mitered corners permanently into place.
| Reinforcement Method. | Structural Strength. | Visual Aesthetic. | Skill Complexity. |
|---|---|---|---|
| Hardwood Corner Splines. | Maximum Joint Strength. | Decorative contrast key. | Intermediate table saw jig. |
| Concealed Dowel Pins. | High Shear Resistance. | Completely invisible. | Precision drilling guide. |
| Rear Corner V-Nails. | Moderate Hold Power. | Hidden on reverse side. | Specialized joining tool. |
| Half-Lap Miter Joints. | Superior Load Rating. | Subtle craftsman detail. | Advanced router routing. |
Specifically, build a simple spline jig to guide assembled frames across table saw blades. Furthermore, insert contrasting timber keys such as walnut splines inside maple frames. In addition, flush-cut and sand splines smooth after drying. Ultimately, corner splines reinforce building picture frames with artisanal longevity.
Tip 6: Sand Progressively and Apply Protective Oil Finishes.
Rushing through sanding leaves noticeable swirl marks and uneven stain absorption across wood. In contrast, progressive dry sanding up to three-hundred-twenty grit produces glass-like smoothness. Proper surface preparation showcases natural wood figure vividly.
For instance, apply multiple coats of hand-rubbed Danish oil or natural beeswax paste. Furthermore, buff timber between coats using fine steel wool to build satin luster. In addition, oil finishes penetrate deeply without creating plastic film buildups. Consequently, premium finishes make building picture frames look gallery-ready.
Tip 7: Install Museum-Grade Matting and Glazing Components.
Standard window glass and acidic cardboard backings cause fading on precious art prints. In contrast, museum conservators always select acid-free cotton rag matting and UV-filtering acrylic glazing. Quality framing materials protect delicate artwork for decades.
Specifically, cut matboard windows with forty-five degree beveled edges using specialized mat cutters. Furthermore, secure artwork using acid-free linen hinging tape rather than standard tape. In addition, seal frame backs with Kraft dust covers to block airborne particulates. Therefore, complete building picture frames execution demands conservation materials.
Common Framing Mistakes to Avoid Proactively.
Even passionate woodworkers encounter pitfalls when assembling custom art frames for galleries. For instance, forgetting to add an extra expansion clearance around glass dimensions causes cracking. Specifically, always cut inner rabbets slightly larger than glazing panels during building picture frames.
Another frequent error is hanging heavy frames using inadequate wire and weak hooks. In contrast, installing heavy-duty D-rings and braided stainless steel wire ensures secure wall suspension. By avoiding these common errors, your custom wall displays achieve flawless durability.
Long-Term Value and Handcrafted Artisanal Charm.
Investing in bespoke woodworking delivers lasting aesthetic pride and financial savings over custom framing shops. In fact, displaying handcrafted frames throughout your home creates an intimate narrative of craftsmanship. For instance, tailored timber moldings harmonize effortlessly with architectural room trims.
Afterward, admiring favorite prints housed within custom timber frames brings immense daily satisfaction. Consequently, dedicating workshop time to custom woodwork transforms living spaces into inspiring personal galleries.
Frequently Asked Questions About Building Picture Frames.
Q1: What is the easiest wood for beginner picture framing?
Poplar and soft maple offer straight grain, stable working properties, and excellent ease of cutting for beginners.
Q2: Why do miter corners open up after gluing?
Imprecise forty-five degree saw angles or uneven clamping pressure cause miter corners to separate during drying.
Q3: How do I calculate picture frame molding lengths?
Add artwork dimensions, double the mat width, double the molding width, and add one-eighth inch for clearance.
Conclusion: Crafting Timeless Frames for Your Home.
In summary, constructing bespoke art borders combines precise miter joinery, durable hardwood selection, and artistic finishing techniques. By calibrating saws accurately, adding corner splines, and using archival matting, you create magnificent wall displays. Embrace these woodworking principles, master building picture frames, and showcase your cherished art with pride.
Visit sageandshelf for more details.