How to Polish Brass Hardware: 7 Best DIY Steps & Tips
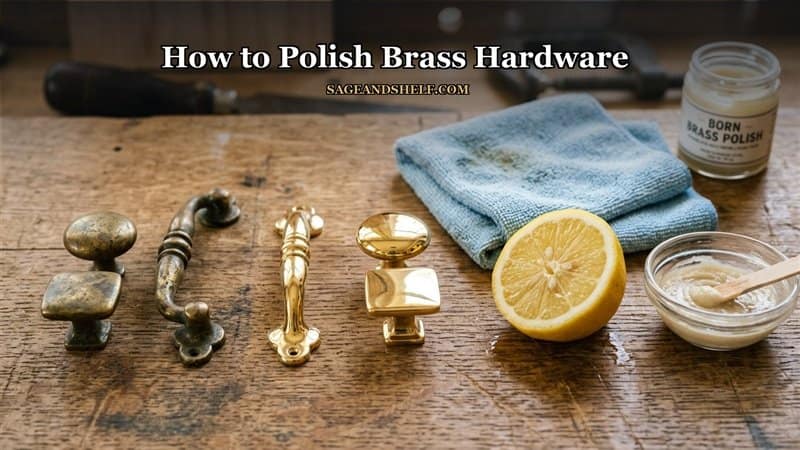
Restoring antique door pulls, cabinet knobs, and vintage hinges instantly elevates the architectural charm of your living space. When restoring authentic solid brass alloy fixtures, dull tarnish gives way to a breathtaking warm golden glow. Specifically, discovering how to polish brass hardware safely removes heavy black oxidation without scratching delicate metal surfaces. In addition, routine metal conditioning preserves heirloom craftsmanship while preventing future environmental corrosion.
Many historic hardware pieces feature protective lacquer coatings that crack, yellow, and trap moisture over decades of use. Fortunately, gentle household pantry ingredients dissolve stubborn verdigris deposits without requiring toxic chemical strippers. Therefore, mastering proper metal care techniques adds substantial value to your home renovation projects. When paired with timeless cabinetry features like a raised panel door, gleaming hardware creates bespoke designer elegance. Consequently, learning how to polish brass hardware transforms tired cabinetry into stunning vintage showpieces.
Understanding Brass Composition: Solid Brass Versus Brass Plating.
Before applying any abrasive cleaning paste, identify whether your hardware is solid brass or thin brass plating. Specifically, learning how to polish brass hardware begins by placing a common household refrigerator magnet against the metal. Solid brass is non-ferrous and will not attract the magnet at all. Conversely, if the magnet sticks firmly, the item is steel or zinc coated with paper-thin brass plating. Moreover, plated metals require ultra-gentle cleaning to avoid wearing away the microscopic brass layer. Consequently, knowing your metal substrate ensures safe, damage-free restoration results.
| Polishing Formulation. | Active Cleaning Agent. | Ideal Hardware Type. | Tarnish Removal Speed. |
|---|---|---|---|
| Lemon & Baking Soda. | Citric Acid & Bicarbonate. | Solid Brass Knobs & Pulls. | Fast (5 to 10 Minutes). |
| Vinegar, Flour & Salt. | Acetic Acid & Sodium. | Heavy Verdigris Latches. | Moderate (20 Minutes). |
| Boiling Soda Bath. | Thermal Bicarbonate. | Lacquered Vintage Hinges. | Fast Lacquer Release. |
| Commercial Cream. | Micro-Abrasive Compounds. | Showroom Mirror Buffing. | Instant High Shine. |
1. The Magnet Test: Distinguishing Solid Brass from Plating.
Always begin your hardware restoration project by performing a simple magnetic verification test. Hold a small magnet against the back of your cabinet handle or door backplate. If the magnet slides off effortlessly, you possess authentic, durable solid brass.
Solid brass can withstand deeper scrubbing, chemical lacquer removal, and repeated mechanical buffing passes. However, if the magnet clings tightly, clean solely with mild dish soap and soft microfiber towels. Furthermore, aggressive polishing on plated steel exposes dark gray underlying metal permanently. Therefore, verifying metal composition prevents heartbreaking damage to irreplaceable vintage hardware.
2. Strip Deteriorated Lacquer with Boiling Water and Baking Soda.
Manufacturers often coat new brass with clear nitrocellulose lacquer to prevent atmospheric tarnishing. Over time, UV light and hand oils cause this lacquer to chip, peel, and discolor unevenly. Polishing over cracked lacquer produces splotchy, uneven results because polishing paste cannot reach underlying metal.
Place old hardware in a disposable aluminum pot filled with simmering tap water. Next, add two tablespoons of baking soda per quart of water and simmer for fifteen minutes. The thermal expansion and alkaline water cause the brittle lacquer film to bubble and peel away cleanly. Rinse the loosened coating under cold tap water and peel remaining flakes using soft nylon brushes. Consequently, stripping decayed lacquer creates a bare, uniform metal canvas ready for polishing.
3. Natural Lemon Juice and Baking Soda: Gentle Organic Deoxidizing.
For everyday tarnish and mild oxidation, natural citrus juice provides a safe, non-toxic polishing solution. Cut a fresh yellow lemon in half and sprinkle baking soda directly across the open fruit flesh. The effervescent reaction creates a mild citric acid paste that dissolves dark surface tarnish gently.
Rub the lemon half directly over flat brass backplates using firm, overlapping circular motions. For intricate crevices and embossed patterns, mix lemon juice with baking soda in a small bowl. Apply the foamy paste using a soft-bristled toothbrush to reach deep grooves safely. Furthermore, coordinated with custom woodwork like molding for kitchen cabinets, bright brass provides gorgeous contrast. Therefore, citrus polishing restores radiant golden highlights without harsh commercial chemical fumes.
4. Flour, Vinegar, and Salt Poultice: Dissolving Heavy Verdigris.
Neglected century-old door hardware frequently develops crusty green copper carbonate deposits known as verdigris. Clearing heavy verdigris requires sustained chemical contact with gentle organic acids. Creating a homemade paste poultice holds active vinegar and salt against vertical metal surfaces effectively.
Dissolve one teaspoon of fine table salt into half a cup of warm white distilled vinegar. Next, add enough all-purpose flour to mix a thick, spreadable frosting consistency. Smear the poultice generously over tarnished brass hinges and let it dwell for twenty to thirty minutes. The mild acetic acid breaks down stubborn crusts while fine salt lifts oxidized grime naturally. Consequently, thick poultice masks restore heavily weathered vintage metalwork effortlessly.
5. Commercial Metal Creams and Microfiber Buffing: Mirror Luster.
When you desire an ultra-bright, reflective jewelry-grade mirror finish, turn to dedicated brass polishing creams. Specialized commercial polishes contain finely graded aluminum oxide particles suspended in mineral spirits. These micro-abrasives smooth microscopic surface ridges without leaving visible scratch lines.
Dab a pea-sized amount of polishing cream onto a clean, dry microfiber cloth. Work the cream across the metal until a dark black residue forms on your cloth. This black residue indicates that suspended oxidation is lifting away from the metal surface cleanly. Next, switch to a fresh, dry microfiber section and buff vigorously to reveal brilliant shine. Ultimately, commercial buffing delivers flawless, showroom-quality reflective beauty.
6. Neutralize Acidic Residues with Warm Soapy Water.
Leaving residual vinegar, lemon juice, or chemical polish on brass invites rapid spot tarnishing within days. Acidic residues continue reacting with ambient oxygen, creating dark unsightly blotches across freshly polished metal. Always wash polished hardware thoroughly in warm water mixed with gentle liquid dish soap.
Use a soft cotton cloth to clean threaded screw holes, handle recesses, and decorative filigree. Next, rinse every component thoroughly under clean running water to remove all traces of soap. Dry the hardware immediately using lint-free microfiber towels or warm air from a handheld hairdryer. Therefore, neutralizing chemical residues locks in your pristine, streak-free polish.
7. Seal with Microcrystalline Wax: Preventing Future Tarnish.
Bare polished brass oxidizes rapidly when exposed to humidity, skin oils, and airborne sulfur. Sealing metal pores with premium microcrystalline wax or carnauba paste prevents oxidation for years. Unlike spray lacquers, high-grade museum wax will not yellow, crack, or peel over time.
Apply a paper-thin layer of microcrystalline wax across warm, clean brass using a soft flannel rag. Allow the wax haze to dry for ten minutes before buffing gently with a clean micro-fiber cloth. In addition, the invisible wax shield repels daily fingerprints, moisture droplets, and kitchen grease splatters. Consequently, protective waxing ensures your brass hardware retains its dazzling glow indefinitely.
Hardware Maintenance Tips by Room and High-Wear Zones.
Maintaining lustrous metal hardware requires tailored care strategies across different residential living environments:
- Kitchen Cabinet Pulls: Wipe weekly with damp microfiber to eliminate cooking grease and acidity.
- Bathroom Vanity Knobs: Maintain high wax barriers to shield polished metal from steam condensation.
- Exterior Entry Locksets: Apply fresh carnauba wax twice annually to protect against rain and UV rays.
- Interior Bedroom Hinges: Dust regularly with soft feather dusters to prevent fine grit accumulation.
Common Brass Polishing Mistakes to Avoid.
Many enthusiastic homeowners make preventable errors that permanently damage vintage brass collections. Using coarse steel wool or abrasive scouring pads creates deep scratch gouges across soft metal faces. Always use soft microfiber towels, flannel rags, or ultra-fine grade 0000 bronze wool.
Another frequent error is soaking brass hardware in harsh muriatic acid or bleach solutions. Caustic industrial acids leach zinc out of the alloy, leaving metal with a permanent pinkish copper tint. Following safe, gentle cleaning steps ensures authentic golden preservation.
Frequently Asked Questions About How to Polish Brass Hardware.
Q1: What is the fastest way to polish heavily tarnished brass hardware?
Simmering hardware in a baking soda water bath strips old lacquer and lifts heavy tarnish in fifteen minutes.
Q2: Can you polish brass without removing it from cabinets?
Yes, but removing hardware prevents acidic polishes from staining surrounding wood, paint, and stone cabinetry. How to Polish Brass Hardware
Q3: Does WD-40 clean and shine brass hardware?
WD-40 loosens surface grime and provides temporary moisture displacement, but it does not polish away deep oxidation. How to Polish Brass Hardware
Q4: How do you keep brass hardware shiny after polishing?
Apply a thin protective coat of Renaissance microcrystalline wax or carnauba paste to seal out moisture and air. How to Polish Brass Hardware
Conclusion: Restore Timeless Warmth to Your Home Hardware.
In conclusion, discovering how to polish brass hardware is one of the most rewarding home restoration projects. By testing metal substrates, dissolving decayed lacquer, and buffing with natural citrus pastes, you revive vintage charm. Remember to neutralize acidic residues, dry surfaces completely, and seal metal with museum-quality wax. Follow these proven steps on how to polish brass hardware to infuse your living spaces with enduring elegance. How to Polish Brass Hardware
Visit sageandshelf for more details.